GUEST PEACE: Fiber.Spindle.Yarn

Laura is a 30-something California native who transplanted to the Midwest seven years ago with the love of her life. She isn’t always enamored of the cold weather, but she does love having a great excuse to knit and spin warm woolies. She is a knitter, spinner, podcaster and lover of all things creative.

I’ve been a knitter as long as I can remember. When I was 6 or 7, my grandmother taught me to knit. She patiently cast the stitches onto the needles and talked me through the process, helping me rip things out when I made mistakes and start again.

IMG_5896I knit on and off through my teenage years, but picked it back up again in college.  When I moved home after college, it was the early 2000’s and knitting and the fiber arts were enjoying something of a renaissance. Suddenly I wasn’t shopping at Michael’s any more, but at beautiful stores filled with nothing but yarn and fiber. 

One of the things I had never seen before was people taking fiber, whether straight from the sheep or processed and dyed in beautiful colors, and turning it into yarn. I was fascinated with getting to touch so many parts of the process. I decided to try it – I took a class on spindle spinning and created my first yarn, something that approximated boat rope.  I was fairly discouraged and went back to my knitting.

IMG_5890
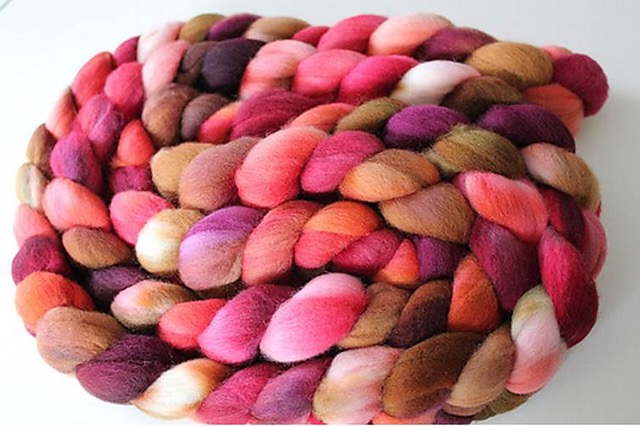
In 2010 I decided that I wanted to try again. I had made quite a few knitting and spinning friends online through Ravelry, and the spinners were posting gorgeous braids of fiber and even more gorgeous skeins of yarn.
Photo Aug 23, 11 40 08 PMI picked up my spindle again and practiced at it.  I had to learn how to handle the fiber. How to open it up and loosen the fiber (a process called drafting) so that I could then add twist to it and create a single strand.  Then I could wind multiple strands together (a process called plying) to create stronger yarn.
I spun happily on the spindle for about 6 months and then decided that I wanted to try a spinning wheel. I took a class at a local yarn shop and I got to sit at at least a dozen different kinds of wheels, and try my hand at spinning yarn.  I ended up with a petite wheel made by an Australian company, an Ashford Joy.
Photo Aug 23, 11 17 46 PMThese days I continue to spin almost every day.  I love purchasing colorful braids of fiber from dyers and turning them into one of a kind yarns. I sell some of my yarns in an etsy shop and others I use to knit my own sweaters and winter accessories and also to knit toys and gifts for others. I love photographing the entire process from fiber to knitted garment.

Love what you see? You can follow Laura on
her blog, The Corner of Knit and Tea,

Twitter

Instagram

And don’t forget to visit her Etsy shop!

Save

Save

Save

Save

Mermaid Princess

One of the hidden gems I have recently discovered as a parent are all of the local theater productions put on by kids. My daughter loves to watch live music and it doesn’t get better for her than to see other kids singing and dancing on stage. They are usually very affordable and just short enough to keep her attention. We went to see The Little Mermaid Jr. with some of her besties and I wanted to make something fun for them to wear during the show.

Believe it or not, all of my crafting supplies came from the dollar store. My idea was to make wands, but I couldn’t resist the matching crowns. I didn’t expect to use all of this stuff, but that is the luxury of shopping at the dollar store!

Sticking to an an “Under the Sea” color scheme, I tied extra ribbons to the wands.

I liked the star wands, but wanted the star to have a bigger presence. I cut out starfish shapes from the glitter foam and bunched and glue-gunned pieces of iridescent cellophane to the backs.

This was then glued to the star on the wand with a matching glitter foam piece to cover the back.

The starfish were finished with turquoise and lime sequins.

I used the same techniques with the crowns as I did the wands. Bunched cellophane pieces and ribbons added an ocean touch. I glued a ribbon to the inside base of the crown so the cellophane would not irritate their foreheads.

Jeweled necklaces finished the ensemble! Our little mermaid princesses wore the crowns throughout the entire performance and they waved their wands in applause for the very talented kids in the show.

Save

Save

Embellished Letters

I am an auntie again!  My adorable little niece is a week and a couple days old and to celebrate this new life, I wanted to share something my mother in law, Vicki, and I made for her.

Vicki told me that she got some letters from the craft store and would love my help in thinking of ways to decorate them for the nursery.
In brainstorming this process, I knew that I wanted multiple textures in order to keep the letters interesting and to give it a really custom and handmade feel.  After a very successful shopping trip, we picked up yarn, tulle, embossed scrapbook paper, glitter, adhesive pearls and chiffon flowers.

To cover the letters in scrapbook paper, trace a flipped over letter on the back of the paper.  After cutting it out, we used spray adhesive to affix it to the letter.  In a matter of minutes, it was dry.

Spray adhesive was also used to cover the “I” with glitter.  We used a couple coats of both just to make sure that there was an even cover of glitter.  Using white glitter on a white painted letter helped to disguise any holes, if there were any.Wrapping the letters in yarn and tulle was by far the hardest step.  I found that by wrapping in the long direction first, as pictured above, and then continuing to wrap in the short direction covered most of the gaps.  A glue gun also helped tremendously to keep the wraps in place as we went along.

Probably the most fun part of the process was embellishing each letter with the florals and pearls in a unique but cohesive way.


It was a challenge to mix so many different elements while sticking to one style.  One thing I try to do, is to pick one element that you really love and center your design around that.  The fabric flowers were one of the first things we found and our favorite.  Everything else we chose was based on those flowers.We can’t wait to see what they will look like up on the wall of the nursery.  I will have to post a photo when they are hung.

Stay tuned as I really want to try these letters again for a friend’s living room!

Save

Save

Personalized Pillows

It’s time for another felt project!  After making the Chicka Letters, I wanted to use the same concept to create personalized pillows for some of the dear little ones in our lives.

20150620-namepillows-01Using the same font but in a smaller size as the Chicka Letters, I printed and cut out letter stencils from the computer.

20150620-namepillows-02From my abundant supply of felt, I tried to pick complementary colors for each letter of the name.  I love this pillow cover because it allows the colors to pop and brings a youthful and modern balance.

20150620-namepillows-03In order to center the name on the pillow, I simply folded the pillow in half height and lengthwise and marked it with a pin.  This gave me a guideline to work from.  After placing all of the letters down, I then measured the left and right margins in order to make sure they were of similar length.  A plastic cutting board inside the pillow case allowed for an easier pinning session!

20150621-namepillows-05This is a case where an embroidery hoop really comes in handy because the pillowcase is pre-made.  Using the hoop kept the opening of the pillowcase wide enough to stitch in and out. And, it’s done!

20150621-namepillows-06


IMG_7065[1] IMG_7072[1]


GUEST PEACE: Boxly

Boxly_TeamKid life doesn’t get much better than playing with an empty cardboard box.  That’s why I am so excited to introduce you to Alicia, Carolyn and Sasha, Product Design Engineers at Stanford University.  Their unique creation, Boxly, touches on all the things a parent could want in a toy: simplistic in form but imaginative and creative in value, environmentally friendly, easy to store, and no batteries required. 

Capture

Our idea for Boxly started with the frustration that so many of the latest toys come with a set of instructions or one “right way to play,” limiting creativity and innovation. As Product Design Engineers, the three of us are always using our hands to build, explore, and problem solve. We believe these are critical skills to develop from an early age. For kids, however, this creative exploration can be scary and unfamiliar — unless it’s in the form of a fort.

LivingRoomFort

But forts take up all the furniture, consume the entire living room, and stay up for weeks.

GlamourShot

We loved the idea of being able to use what kids can find around the house and we began to notice tons of cardboard boxes. So we took this fun and familiar object and created Boxly, a 100% recyclable fort building kit.

Collaboration

It lets kids define their own creative space by giving them the confidence — and the cardboard — necessary to build big. It has the familiarity of a cardboard box without constraining shape or size.

PersonalCardboard

And, the connectors can be used with any standard one-ply cardboard, providing even more opportunities for creativity.

ConnectorWe have intentionally avoided instructions and sample structures because we want kids to take ownership over their play. Kids can use their own cardboard and art supplies to build something they have complete creative control over — and Boxly helps them get started.

With only 16 days left on , they need your help to make Boxly a reality! I can’t wait to see what our daughter can create, and let’s be honest, my husband and I can’t wait to play either.  I hope you will consider supporting Boxly and even better, getting a set of your own!

Find out more about Boxly, and follow their journey on Facebook and Twitter.

Save

Save

Framing a Milestone

Greeting cards…from birthdays, from showers, from graduations, stacked high in boxes, in the closet, in the garage, or not.  Maybe they collect for a day or so and then find themselves in the trash bin.  Yes, we have all done it with maybe just a little bit of guilt, or not.

cardscutouts-26The first Milestone Frame I ever did was after our wedding. This project lent itself nicely to this time as we had just celebrated a major moment in our lives and were beginning to build our home.  The same goes for baby showers and first birthdays as the parents I know are always looking for ways to decorate the walls of the nursery.  This current project is from the cards from Julie’s baby shower.
cardscutouts-2cardscutouts-6After gathering all of the cards from the occasion, I used a heart shaped punch to highlight certain pictures or patterns that I thought were interesting and in this case, cute!  Sometimes, I find entire pieces of a card to incorporate, like the letters, the bear, and the duckie.
cardscutouts-13The best part about getting a card is the message inside.  Before closing up the back, I wanted to make sure to preserve and include these well wishes.

cardscutouts-14
cardscutouts-composite1In this piece, the hearts took a very organic shape around the letters.  In others, I have used a more structured form.  On a side note, my favorite place to buy frames is IKEA.  This is the Viserum, but I also love the Ribba and the Sondrum.  The frames are classy, modern, come with matte board and are unbeatable in price!

IMG_00176
For my nephew’s room from the baby shower.
cardscutouts-27
For a first birthday.

As a gift or something you do for yourself, with happy occasions or even ones with grief, these Milestone Frames can serve as a constant reminder of all the love and support around you.

INSPIRED PEACE

Save

Save

Save

Memories of a Wedding…Dress

WeddingOn May 1st, my husband and I celebrated our five year wedding anniversary! In honor of this special milestone, I wanted to share a way that my wedding dress has evolved since that time.

details037_compositeAround our one year, I cut my entire dress to shreds.  No…it was not out of anger and YES…I was terrified to do it.  What prompted me to do to such a thing was the thought of this beautiful dress stashed in the corner of our closet, only to gather dust and be forgotten. I wanted it to be a part of our everyday lives.

weddress-3My dress, although simple, had delicate fabric and beaded flowers scattered along the skirt and train.  They were a perfect part of the dress to display. For contrast and to make the embellishments stand out, I draped the ivory, flowered netting on top of a solid grey fabric.  They were then framed and hung over our bed.

weddress-1I think I can speak for most in saying that finding artwork for your home is really difficult.  Ideally, you want something that both reflects your style and has meaning.  This was a fantastic option to fulfilling both. Not only does this fit the look of our home, but when I walk into our room, I am reminded of our wedding day and how incredibly grateful I am for the last five years.

Wedding photography by Karen Nakamura

Save

Save

5 Minute Frame

A dear friend and colleague of mine will be a first-time grandmother to not one,  BUT THREE grandchildren this year!  I had been keeping an eye out to find frames to showcase all 3 grandbabies in her office.  Nothing was striking me, and so, I decided that I should start with something simple and elaborate on it.

framedphoto-3

My original ideas were to cover the entire matte board in some sort of print or cut out large paper flowers and put in the corners of the frame.  Going through my expansive collection of scrapbook paper to find inspiration, I came across a geometric pattern which happened to have wording applicable to the occassion.

framedphoto-1

I used the outline of the geometric shapes to cut out interesting patterns that could be glued right onto the matte board.

framedphoto-2

With minimal time or effort, this is a fantastic way to add a personal touch to your gifting.


Save

Save

Save

Julie’s Baby Shower

I had the honor of helping to throw a baby shower for my sister-in-law, Julie, with a wonderful group of ladies.

Baby Shower

There wasn’t one theme to the party, but many recurring touches: florals, hearts and chalkboards in pinks, greys and golds.  My toddler generously donated the use of her easel for the welcome at the door.

Composite3

You will soon learn that I have a thing for scrapbook paper.  I find the possibilities of its use endless.  These heart lanterns were made from 4 sheets of scrapbook paper and a couple sheets of tissue.

Composite2

The longer I throw events, the more I understand the value of creating sustainable decor.  With the help of my mother-in-law, Vicki, we made fabric flags using various prints and patterns that Julie can hang in the nursery.  The paper heart cut-outs surrounding the invitation were the scraps from the heart lanterns.

Elephants

From the fabric scraps, Vicki made these adorable stuffed elephants.

Florals

Using a random assortment of vases and a handful of flower bunches from the market, arrangements were scattered all around the house.  If you find arranging flowers a daunting task, use small and simple combinations with only a couple different types of flowers.

Composite7

More scrapbook paper!  Attached to sticks, you can plop them into centerpieces, in food displays and even use them to cover the tables.  These three platters are some of my favorites as the height gives the buffet spread a little more dimension.

Composite6

If there was one thing that was absolutely necessary, at this shower in particular, it was dessert!  Cari and Heather did a fantastic job with fruit skewers, dipped rice krispie treats and Oreo pops!

juliebs-33

Heather put together the “Headband Bar” and it was a great way to let everyone put their touch on a little gift for the new baby.

Composite5

This centerpiece is made with dollar store fake flowers and Honest Co. rolled diapers in their strawberry print.  Each of the planning ladies were asked to bring a onesie to make another element of decor that is adorable and functional. Go Dodgers!

juliebs-1

Vicki created a diaper cake and this little diaper bassinet!

Composite9

Incorporating the fonts and images from the original invitation, Cari took regular candles and made them into custom, elegant favors.

juliebs-200

If you couldn’t tell by now, Julie and Lance will be welcoming a sweet baby girl in July and we are SO excited!

Thank you for all your help, Vicki, Cari, Mary, Erika, Heather and Marcy!  I don’t think the day could have been more perfect for Julie, someone we love very much.

Save

Save

A Built-In of Our Own Design

We absolutely love our home.  Although small, it is very bright, comfortable and has a good flow.  We use almost every single inch of the house and if there is an opportunity to gain more storage and make use of some space, we take it!

This is our dining room built-in design process with construction and installation by the fabulous Matt Mason and team!

Fishman LR Built In_drawing

After some research online and an inventory of everything that we would need storage for, this was my design.  The unit needed to function as a buffet/office/craft room.  The drawing was super helpful in showing contractors what we needed.

NEW 3D

MW Mason Construction was able to create something almost exactly like my original drawing.

Photo Mar 25, 8 52 47 AM

Yes, we had a huge 70’s mirror and slate flooring on the wall in the area where the built-in would go.  Being that the wall was inset a foot and a half, it was the perfect location for a built-in.

builtincabinet-6

And just like that, my vision became a reality!

builtincabinet-8 Using oak allowed the grain to peek through. Chrome drawer pulls and crystal knobs for the doors add just a touch of shine and sparkle.

builtincabinet-11

The stone for the backsplash was love at first sight. It was rather pricey but with such a small area to cover, we couldn’t resist.

As I sit here, working on this post at our new desk, I love knowing that this has become a much more usable, enjoyable and beautiful space in our home!

Save

Save