A Hot Air Balloon First Birthday

When my sister-in-law told me she wanted my nephew’s first birthday theme to be “Growing UP, UP, UP”, I was super excited. The possibilities with hot air balloons seemed endless. To start the process, I gave her a selection of color palettes and asked her to pick her favorite. I find that this is the best place to start. When you begin an event, you most always have an idea of a few colors you would like to use, but finding coordinated hues can be difficult. That is where searching color palettes online comes in handy and you can base the entire event off of an inspired palette.

For invitations, I like to incorporate a 3D aspect using foamy double-sided tape. In this case, I found mismatched prints that went with the theme and cut out number ones. Pair with red envelopes and they are ready to send! The other item that I was in charge of was the Happy Birthday banner. Using the same font from the invitations, I printed and cut out letter stencils on cardstock.  Those stencils were used on a thick, red scrapbook paper.
For the bunting, I cut letter-sized, brown, kraft colored paper in half and created another stencil to cut out the triangular shape from the bottom.  Punch two holes on the top and string! To add more color and make it a little more dynamic, I picked out 3 coordinating prints and 3 solid papers in the same colors.  Having the color palette on my phone made it easy to make sure I was picking out the correct shades at the store.
Spray adhesive really worked best on this project as the craft glue was creating wrinkles in the paper. The party was at a beautiful park in the neighborhood. To separate each word on the banner, I used the extra invitations and as a finishing touch, added some red, burlap ribbons.
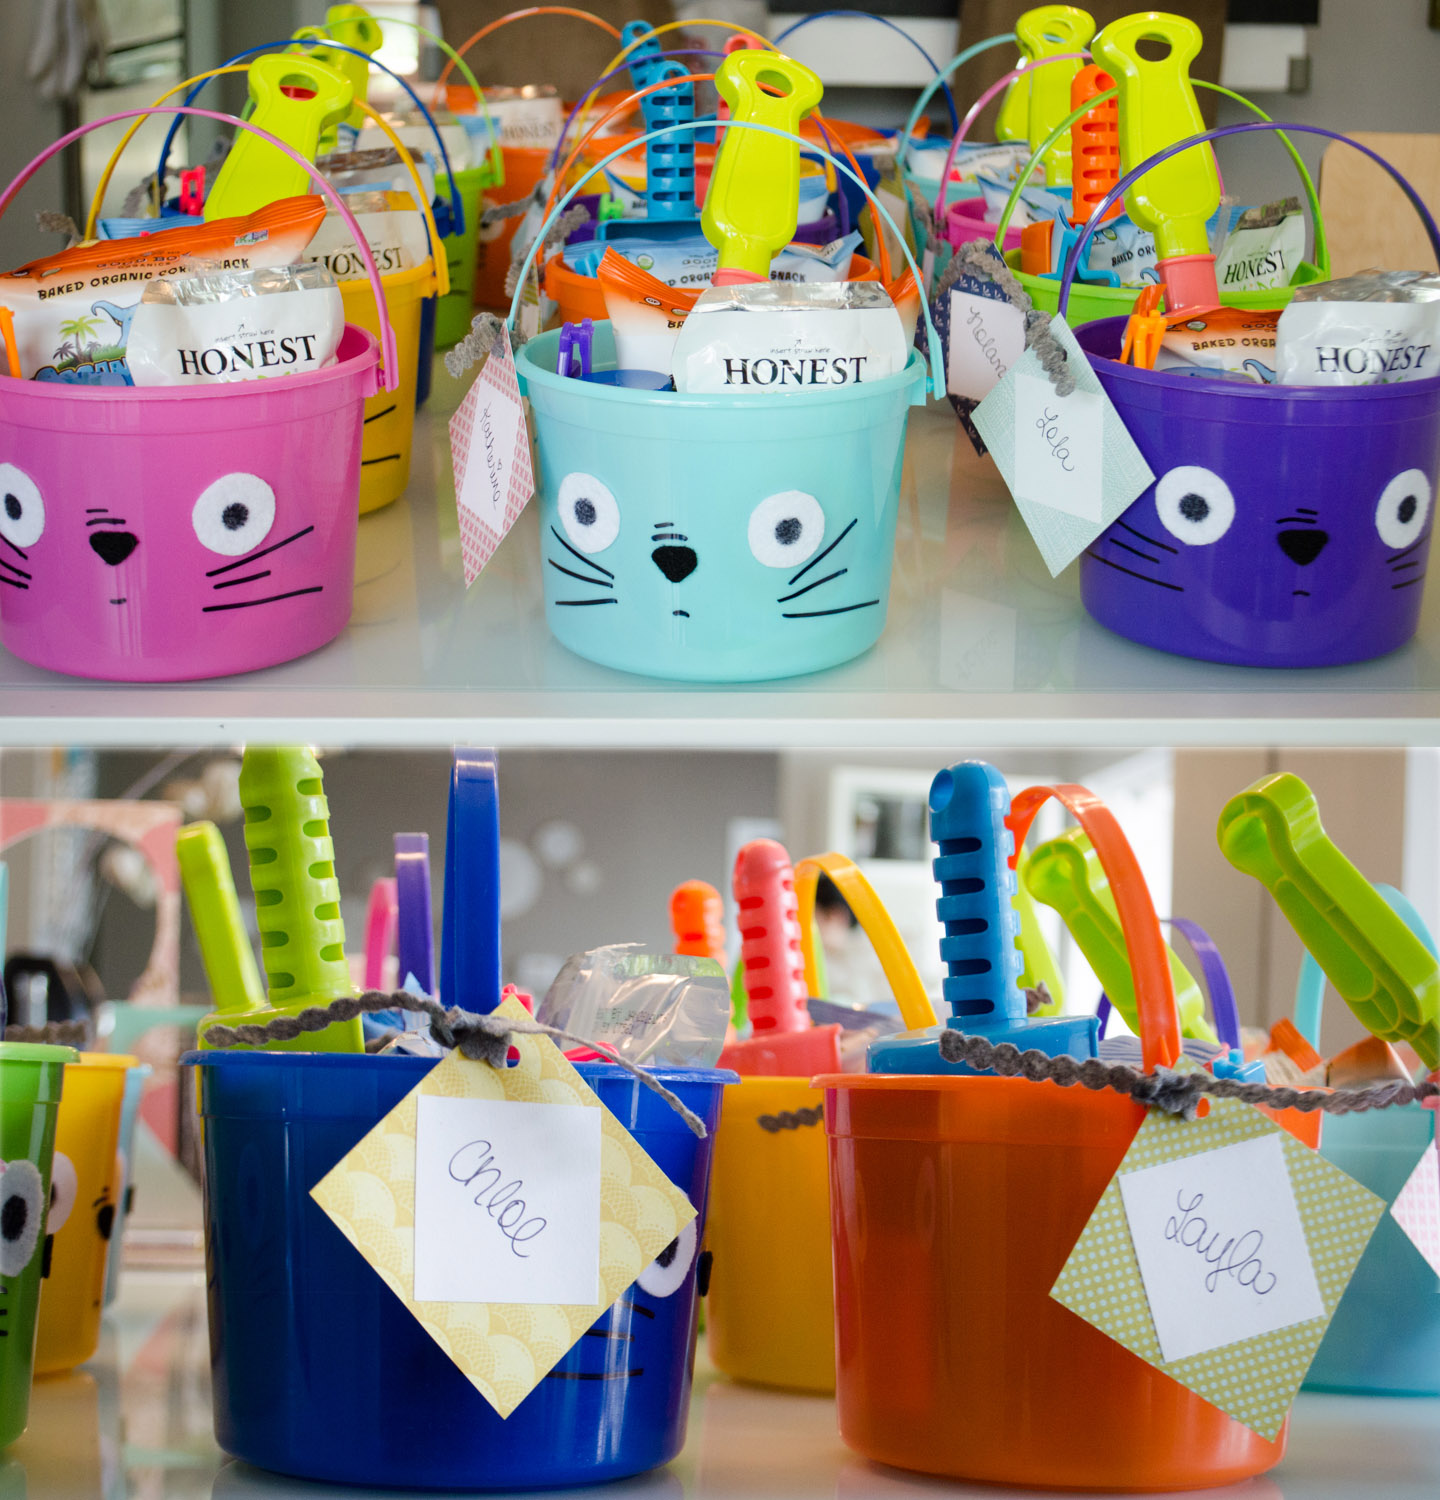
My sister-in-law created this adorable banner of all of the monthly photos using scrapbook paper and string to attach and decorate the baskets. In a stroke of luck, Oriental Trading Co. had these paper lantern, hot air balloons in the exact colors we needed. They really added to the space and were super easy to assemble and take down.
It was a beautiful day only made better by celebrating the very first birthday of the sweetest little nephew.

Save

Save

Mermaid Princess

One of the hidden gems I have recently discovered as a parent are all of the local theater productions put on by kids. My daughter loves to watch live music and it doesn’t get better for her than to see other kids singing and dancing on stage. They are usually very affordable and just short enough to keep her attention. We went to see The Little Mermaid Jr. with some of her besties and I wanted to make something fun for them to wear during the show.

Believe it or not, all of my crafting supplies came from the dollar store. My idea was to make wands, but I couldn’t resist the matching crowns. I didn’t expect to use all of this stuff, but that is the luxury of shopping at the dollar store!

Sticking to an an “Under the Sea” color scheme, I tied extra ribbons to the wands.

I liked the star wands, but wanted the star to have a bigger presence. I cut out starfish shapes from the glitter foam and bunched and glue-gunned pieces of iridescent cellophane to the backs.

This was then glued to the star on the wand with a matching glitter foam piece to cover the back.

The starfish were finished with turquoise and lime sequins.

I used the same techniques with the crowns as I did the wands. Bunched cellophane pieces and ribbons added an ocean touch. I glued a ribbon to the inside base of the crown so the cellophane would not irritate their foreheads.

Jeweled necklaces finished the ensemble! Our little mermaid princesses wore the crowns throughout the entire performance and they waved their wands in applause for the very talented kids in the show.

Save

Save

Embellished Letters

I am an auntie again!  My adorable little niece is a week and a couple days old and to celebrate this new life, I wanted to share something my mother in law, Vicki, and I made for her.

Vicki told me that she got some letters from the craft store and would love my help in thinking of ways to decorate them for the nursery.
In brainstorming this process, I knew that I wanted multiple textures in order to keep the letters interesting and to give it a really custom and handmade feel.  After a very successful shopping trip, we picked up yarn, tulle, embossed scrapbook paper, glitter, adhesive pearls and chiffon flowers.

To cover the letters in scrapbook paper, trace a flipped over letter on the back of the paper.  After cutting it out, we used spray adhesive to affix it to the letter.  In a matter of minutes, it was dry.

Spray adhesive was also used to cover the “I” with glitter.  We used a couple coats of both just to make sure that there was an even cover of glitter.  Using white glitter on a white painted letter helped to disguise any holes, if there were any.Wrapping the letters in yarn and tulle was by far the hardest step.  I found that by wrapping in the long direction first, as pictured above, and then continuing to wrap in the short direction covered most of the gaps.  A glue gun also helped tremendously to keep the wraps in place as we went along.

Probably the most fun part of the process was embellishing each letter with the florals and pearls in a unique but cohesive way.


It was a challenge to mix so many different elements while sticking to one style.  One thing I try to do, is to pick one element that you really love and center your design around that.  The fabric flowers were one of the first things we found and our favorite.  Everything else we chose was based on those flowers.We can’t wait to see what they will look like up on the wall of the nursery.  I will have to post a photo when they are hung.

Stay tuned as I really want to try these letters again for a friend’s living room!

Save

Save

Personalized Pillows

It’s time for another felt project!  After making the Chicka Letters, I wanted to use the same concept to create personalized pillows for some of the dear little ones in our lives.

20150620-namepillows-01Using the same font but in a smaller size as the Chicka Letters, I printed and cut out letter stencils from the computer.

20150620-namepillows-02From my abundant supply of felt, I tried to pick complementary colors for each letter of the name.  I love this pillow cover because it allows the colors to pop and brings a youthful and modern balance.

20150620-namepillows-03In order to center the name on the pillow, I simply folded the pillow in half height and lengthwise and marked it with a pin.  This gave me a guideline to work from.  After placing all of the letters down, I then measured the left and right margins in order to make sure they were of similar length.  A plastic cutting board inside the pillow case allowed for an easier pinning session!

20150621-namepillows-05This is a case where an embroidery hoop really comes in handy because the pillowcase is pre-made.  Using the hoop kept the opening of the pillowcase wide enough to stitch in and out. And, it’s done!

20150621-namepillows-06


IMG_7065[1] IMG_7072[1]


Chicka Letters

20150607-chickaletters-04A told B,
and B told C,
“I’ll meet you at the top
of the coconut tree.”

At age 1, this was the first book our daughter absolutely loved and needed to read over and over and over again.  Correction, needed “US” to read over and over and over again.  I can still pretty much recite the entire book in my head.

I wanted to make the story more interactive for her and so, I decided to make the letters 3D.

20150607-chickaletters-10I picked a font that was fairly similar to the letters in the book, and printed out templates on plain pieces of white paper.  Using those as stencils, I traced two copies of each letter onto colored felt (I LOVE felt!) with black marker and cut them out.  I read that a chalk pencil works best to trace on felt, but didn’t have one.  A black sharpie it was!  And honestly, it worked fine.20150607-chickaletters-18With a needle and some embroidery thread, I did a quick, simple stitch around the letters anywhere from 1/8″ to 1/4″ apart.  I didn’t have thread to match all of the colors but used similar tones. A chopstick did the trick to push the stuffing down in long and narrow portions.

20150607-chickaletters-14

I have to admit, they came out pretty awesome and I learned from this process that felt is pretty forgiving.  Even though my cuts were not straight or my stitches were uneven, you couldn’t even tell. 20150607-chickaletters-07Needless to say, our daughter loves them.  For those of you familiar with Chicka Chicka Boom Boom, this is her favorite part of the book. Now, it is ten times better because she can throw all the letters in the air and yell, “Oh no!”

Save

Save

Save

Save

GUEST PEACE: Boxly

Boxly_TeamKid life doesn’t get much better than playing with an empty cardboard box.  That’s why I am so excited to introduce you to Alicia, Carolyn and Sasha, Product Design Engineers at Stanford University.  Their unique creation, Boxly, touches on all the things a parent could want in a toy: simplistic in form but imaginative and creative in value, environmentally friendly, easy to store, and no batteries required. 

Capture

Our idea for Boxly started with the frustration that so many of the latest toys come with a set of instructions or one “right way to play,” limiting creativity and innovation. As Product Design Engineers, the three of us are always using our hands to build, explore, and problem solve. We believe these are critical skills to develop from an early age. For kids, however, this creative exploration can be scary and unfamiliar — unless it’s in the form of a fort.

LivingRoomFort

But forts take up all the furniture, consume the entire living room, and stay up for weeks.

GlamourShot

We loved the idea of being able to use what kids can find around the house and we began to notice tons of cardboard boxes. So we took this fun and familiar object and created Boxly, a 100% recyclable fort building kit.

Collaboration

It lets kids define their own creative space by giving them the confidence — and the cardboard — necessary to build big. It has the familiarity of a cardboard box without constraining shape or size.

PersonalCardboard

And, the connectors can be used with any standard one-ply cardboard, providing even more opportunities for creativity.

ConnectorWe have intentionally avoided instructions and sample structures because we want kids to take ownership over their play. Kids can use their own cardboard and art supplies to build something they have complete creative control over — and Boxly helps them get started.

With only 16 days left on , they need your help to make Boxly a reality! I can’t wait to see what our daughter can create, and let’s be honest, my husband and I can’t wait to play either.  I hope you will consider supporting Boxly and even better, getting a set of your own!

Find out more about Boxly, and follow their journey on Facebook and Twitter.

Save

Save

Framing a Milestone

Greeting cards…from birthdays, from showers, from graduations, stacked high in boxes, in the closet, in the garage, or not.  Maybe they collect for a day or so and then find themselves in the trash bin.  Yes, we have all done it with maybe just a little bit of guilt, or not.

cardscutouts-26The first Milestone Frame I ever did was after our wedding. This project lent itself nicely to this time as we had just celebrated a major moment in our lives and were beginning to build our home.  The same goes for baby showers and first birthdays as the parents I know are always looking for ways to decorate the walls of the nursery.  This current project is from the cards from Julie’s baby shower.
cardscutouts-2cardscutouts-6After gathering all of the cards from the occasion, I used a heart shaped punch to highlight certain pictures or patterns that I thought were interesting and in this case, cute!  Sometimes, I find entire pieces of a card to incorporate, like the letters, the bear, and the duckie.
cardscutouts-13The best part about getting a card is the message inside.  Before closing up the back, I wanted to make sure to preserve and include these well wishes.

cardscutouts-14
cardscutouts-composite1In this piece, the hearts took a very organic shape around the letters.  In others, I have used a more structured form.  On a side note, my favorite place to buy frames is IKEA.  This is the Viserum, but I also love the Ribba and the Sondrum.  The frames are classy, modern, come with matte board and are unbeatable in price!

IMG_00176
For my nephew’s room from the baby shower.
cardscutouts-27
For a first birthday.

As a gift or something you do for yourself, with happy occasions or even ones with grief, these Milestone Frames can serve as a constant reminder of all the love and support around you.

INSPIRED PEACE

Save

Save

Save

Totoro Party

My kiddo has been enamored by the Japanese animated film, Totoro, from the first time he saw it and we knew this would be the theme for his second birthday. Preparation started months before, not necessarily creating but brainstorming. This was not something I could run to the store and buy for, so I had to figure out how to create the best Totoro party from scratch.

Here are some supplies you can use to make your own!

sootsprites-2

Totoro-2+SS_forblog

More often than not, I start to create for parties without knowing exactly what I am going to do with them.  My motto is that you can always find a place for things as long as you are happy with the outcome.  The design of Totoro is so simplistic, it lends itself nicely to the imagination.  The soot sprites are a sort of dust bunny in the film.  What could be easier than googly eyes on a black poof ball!

totofavors_forBLOG

I hardly ever throw anything out from a previous event.  These buckets were the centerpieces at my daughter’s first birthday and I was able to draw a quick Totoro face with black marker and a little felt and use them for favors.  Tags made of Japanese inspired scrapbook paper completed the look.

Ellie's-2nd-Banners_COMPOSITEforBlog

Creativity definitely runs in the family.  My mother and sisters made the birthday banner, my cousin made the soot sprite cupcakes and my brother in-law took the photos at the park.

Ellie's 2nd 03.29.15 - 4

Ellie's 2nd 03.29.15 - 5

cupcakes1

Ellie's 2nd 03.29.15 - 9-10_COMPOSITEforBlog
tototys-4

I still love sending mail and I think people still enjoy receiving mail!  I found a pack of Totoro playing cards online and thought they would be a great addition to create custom thank you cards.

photos by cole-montgomery.com 

I could not have been happier with the way the decorations worked with the location and I am so incredibly thankful to everyone who made the day so special for our little one!

Save

Save

Save