GUEST PEACE: A FUN CHRISTMAS JUMPER

 IMG_7534Samantha is from England but has been in the U.S. for almost 8 years. She has been an amateur knitter most of her life after her grandmother taught her at an early age. She loves crafting but struggles to complete projects. She has recently started making what she calls “cheat-quilts” – sewing quilts without using any correct technique. Samantha loves making gifts for friends kids and any time she completes a project she is very happy. She says that the best part about crafting is the relaxation it provides so she never takes any project too seriously.

I really love Christmas, and I especially enjoy Christmas crafting. It’s a habit that only really started a few years ago when I found some winter wonderland felt templates on the Martha Stewart website. I had just found out my best friend was pregnant with her first child and in a show of solidarity I decided to not drink alcohol for her entire pregnancy so I spent New Year’s Eve making lots of Christmas tree ornaments for the following year instead of partying.

I came up with the Christmas jumper idea because I had an old jumper that was really comfortable but had a hole in it, so instead of throwing it away, I decided to alter it. I first knitted Christmas trees. I opted for untraditional tree colors (blue and white) because I happened to have that wool lying around and also because I thought they would look icy and snowy.


To knit the trees I cast on a few stiches (4 for the big tree and 2 for the small) and knit for a few rows to form the tree trunk and then at the end of each row, cast on more stiches (10 for big and 7 for small), knit across and then began reducing the stiches at either end to create a triangle type shape for the branches. Once I got back to my original trunk stiches I would knit one row and then begin casting on again at each end,  doing less this time to create smaller branches as the tree got bigger. I sewed the trees onto the jumper covering the hole using a gold thread.


Once the trees were attached I used the gold thread again to sew on little tiny beads in a looping effect to create tinsel. This took a very long time and was a bit frustrating because not all the little beads had the same size center hole so my needle wouldn’t always fit through. If I made another jumper I would sew the tinsel onto the trees before sewing the trees to the jumper because it made a big mess with the thread on the inside of the jumper – but it’s ok, no one can see it.


 The last detail was to sew on little charms which I found at Michaels. I used snowflake shapes, little gifts, stars for the top of the trees and I was most excited to find little multi-colored lights which I attached between the tinsel.


This was such a fun project that really didn’t take very long and I was so pleased with the result. I was really proud of myself because I am a total amateur when it comes to crafting. The one little catch that I didn’t think about when I was making it though…. I can’t wash it. Febreze!!!

Save

Save

GUEST PEACE: Fabric Leaf Coasters

246676_4716433631114_1290277048_nJulie a fifty-something, married, full-time working mom of recent college grad Eric and college junior Ali.  After two years, she is starting to discover some good things about the life of an empty nester:  expanding from focus on the kids and career to her place in a larger world, with time to appreciate both natural and designed beauty.  So she crafts and bakes now whenever the inspiration strikes…. why not?

I needed coasters for our high rise condo and have always liked fabric coasters.  I searched online but couldn’t find fabric coasters that I really liked, so thought I’d try making some myself.  I wanted to add an organic touch to our contemporary decor, so I chose to make coasters that mimic various leaves:  maple, palm, gingko, etc.

1.  Sketched a few different leaf shapes onto felt and cut them out.

2.  Cut out a matching shape in a complementary felt color.
3. Embroidered the “veins” on the outward side of each felt leaf.  I used both metallic and matte embroidery flosses.4. Hand stitched the two sides together (right sides out) and embellished with a crystal droplet bead for a little bling.
I love how they turned out!  You can use different leaves or colors for different seasons.  Or different holiday themes:  Hearts, flowers, snowflakes, etc.  Maybe even initials or words.  They cost pennies to make and they’re both decorative and functional!

Save

Save

Guest Peace: Lola’s Market

 Linda is a Southern California native and a passionate party planner in her spare time. Every event she holds is perfected down the the smallest detail.  She has a beautiful eye for color and shabby-chic, rustic decor. She is a loving wife, mother of 6 and has 7 grandchildren with one on the way!  That’s a lot of parties!

Our little Lola loves our small garden in the backyard and that inspired me to create this party for her.  She loves the flowers, orange tree, tomatoes and herbs. She likes to pick the fresh basil, mint, and grape tomatoes and pretend she’s making soup!

The bunting was made by my husband, Reid using a 1/2 yard of burlap, fabric paint, alphabet stencils, a stencil brush and some twine.

My daughter Sarah assembled these huge, gorgeous, paper flowers from a Martha Stewart flower kit.
  Outside, we taped vegetable seed packs to the patio beams for decoration.

For centerpieces, we used kale, tomato & pansy plants and wrapped the pots in fabric.

To add to the fresh farm theme, we served our veggies in berry baskets and the raisins, candy corn and chips in bushel baskets.

Photo Sep 30, 8 17 52 PM (2)

The food table was decorated with fresh flowers, crates and chalkboard signs to add to the rustic feel and the lucky kiddos went home with a favor bag full of yummy snacks.

To finish it all off, we ordered a green cake and added fresh flowers the day-of.  Happy Birthday Lola!

Save

Save

A Peace with Cole Montgomery

As a wrap-up to my collaboration with photographer, Cole Montgomery, I wanted to leave you with a gallery and a few words on what inspires Cole.

I greatly admire his ability to take something you see everyday and highlight its beauty. His deliberate and expert eye can make you see something that you didn’t even realize was there. I hope these have inspired and motivated you in your creative process.

 
  Change

  IMG_4783
 IMG_4902

Cole MontgomeryI’m driven to photograph the smallest moments. These moments are not mundane but instead embody the peace and possibility prevalent in life. We can take refuge in these small moments when things are full and chaotic. A huge thank you to Mel for featuring some of my work and adding in wonderful words of inspiration.

To see more of Cole’s work be sure to visit cole-montgomery.com
and follow him on Instagram.

Save

Save

GUEST PEACE: Invitation 101, A Crash Course

Desiree Jacobs is the Founder of Heirloom Paper Co. She grew up in the greater Los Angeles area and attended college at California State University, Northridge. After 10 years in non profit and corporate worlds, Desiree decided to professionally explore her love of special events and fine paper products. As a wedding enthusiast and stationery obsessive, it was a natural fit for her to start Heirloom Paper Co. based in Encino, CA.

Bloomsbury-9766I’ve always considered myself a creative person, but I’m not a painter, a musician, or a photographer. I struggled with how to tap into my creativity and I realized awhile ago that while I’m certainly not a skilled artist, I have a strong eye and a good sense of how to take a vision from an image in my head to a tangible reality. As owner of Heirloom Paper Company, I work with my clients on creating custom invitations for weddings, mitzvahs, and parties, and really enjoy helping my clients tap into their vision of their event and creating an invitation that will set the tone of their event.

Reticella

Invitations can be printed using any one or a combination of printing processes: thermography, engraving, digital printing (offset/flat), and letterpress. Your invitation suite always features the main invitation and envelope with or without a liner, and is typically accompanied by a reply card, reply envelope, and often one or more additional cards to share information with guests regarding accommodations, transportation, weekend events, or website information.

My personal favorite style of printing to work with is letterpress. I love the texture of thick cotton stock, fabulous ink colors and foils, and the variety of fonts, especially with some of the modern hand calligraphy style fonts. Working with letterpress invitations allows me to tap into my creativity and collaborate with my clients in a unique way. I tend to approach each invitation as a blank slate with my clients and together we dress it up by selecting a layout and each element of the invitation starting with the color and thickness of the paper. We choose our font families (no more than three or it will look too busy!) and color scheme. We bring in design elements like flourishes, motifs, or monograms. Lastly we talk about any extra embellishments to make the invitation pop like edge painting, die cuts, and solid or patterned backers and portfolios.

A few trends in letterpress that I am really excited about are the use of calligraphy and digitally printed patterns. Hand calligraphy and calligraphy style fonts are very popular for bride and groom names and are such a key element in creating style. The use of digitally printed patterns like watercolor or vintage floral prints layered under letterpress text is a newer process that lends itself to a really fresh look. I am swooning over invitations that combine these trends alongside the use of metallic foil. Hello gorgeous!

Lucaya-1

Blush

Ellory-9795The key to a cohesive invitation suite is consistency: consistency in fonts, colors, design details, as well as a consistent level of formality. If you are going for a modern and artsy wedding, think about the language, not just in the look and feel. Of course there is etiquette to be mindful of, but it’s ok to break the mold in a few areas- use numerals rather than spelling out dates and choose fonts that reflect a modern tone. For more formal weddings, spell out all dates, always spell out addresses, and choose more elegant fonts and color palettes.


flynn-201505299133

Love what you see?  Follow Heirloom Paper on Facebook and Instagram.

Want to talk invitations? Email Desiree at desiree@heirloompaper.com
or visit Heirloom Paper Co.

Images courtesy of Smock Paper and Bella Figura
and are available through Heirloom Paper Co.

Save

Save

Save

Save

GUEST PEACE: A Young In Love Bridal Shower

Group ShotKim, Chelsea, Amy, and Tracey are proud to highlight a bridal shower they threw for their very good friend, Megan. They all met in elementary school playing basketball and have remained close friends since then. Megan and her mother are very gifted and creative when it comes to DIY projects. The mother-of the-bride was hand-making most of the wedding flowers, decorations, etc. and because of this, they wanted to put the same DIY love into her bridal shower.

This post contains affiliate links, which means I receive a small compensation if you make a purchase using the links below.

TIP: Oil based paint pens are brighter and last longer. The water base paint pens are more likely to smear easier and are not as bright.

This piece was simple and cheap. The chalkboard sign was from Michael’s craft store with a simple tissue pompom for an accent. We spent countless hours on Pinterest grabbing ideas and finding inspiration for our signs and decorations. Amy was the creative genius behind all the custom made signs.

TIP: Oil based paint pens are brighter and last longer. The water base paint pens are more likely to smear easier and are not as bright.

Photo Aug 14, 4 02 03 PMWe basically bought out every single Michael’s within the Los Angeles area. Scouring the shelves for decorations, materials, chalkboards, and frames; anything that went with our rustic theme. We came across these letters and waited until they were on sale, then grabbed them up for only $2.50 each!

TIP: Gather as many coupons for Michael’s as you can and keep up-to-date with all the weekly sales.

Photo Aug 14, 4 19 51 PMLooking for a keepsake to give the bride-to-be after her celebration and wanting it to reflect who she is, we decided to do a twist on the traditional guest book. We came up with the idea of having a “guest ball” for all the girls to sign for our baller bride.

Photo Aug 14, 4 35 20 PMMegan is the Martha Stewart of desserts and bakes the most amazing cakes, cookies, cupcakes, breads; basically anything even considered a dessert. We wanted to do right by her and make the dessert table one of the highlights of the shower. Megan loves cookies and cream, so Chelsea made amazing bite size Oreo cheesecakes and the flower girl had about 10 of them within just a few minutes. There was also Devil’s Food Cake in a shot glass, strawberry jell-o with a pretzel crust and whipped cream filling, and delicious Bavarian Pear Tarts. We included jars filled with Megan’s favorite candies – Twix, Starburst Jellybeans, and Now & Laters and ordered mini mint ganache cupcakes from Lady Di’s Cookies and Sweets.

Photo Aug 14, 4 33 30 PMThe favors were candied apples also ordered from Lady Di’s. The mother-of-the-bride chose the White Chocolate Cheesecake apple and the Grandma’s Apple Pie apple. Tracey wanted to make the favors a little more personal by adding special gift tags to each one. These were made by first printing out the note on card stock, and then using a gift tag hole puncher to cut each one out.

Photo Aug 14, 3 49 08 PMOutside, multi-size tissue pompoms were arranged for a chandelier affect hanging from the center of the canopy. Amy made about twenty pompoms in total, which were mainly used for the faux chandelier and disbursed in various locations around the shower. The instructions for constructing the pompoms were found on our go-to site, Pinterest.

TIP: For larger pompoms – use more sheets of tissue paper for a fuller affect. For smaller pompoms, use less sheets to ease the construction of fluffing out the paper.

Photo Aug 14, 4 13 36 PM

Wanting to continue with our rustic theme, we chose to use mason jars for the drink ware. We tied small name tags around each jar and made it extra special by handwriting each guests’ name on a tag.

Photo Aug 14, 4 39 24 PM
Another highlight was the sangria bar! Who doesn’t love a refreshing sangria with a variety of freshly cut fruits on a hot summer afternoon? We used crates to elevate the jars and house the drink ware. We were fortunate enough that Chelsea had two original vintage 7-up crates, which made an amazing addition to our sangria bar. We made sure to also provide a non-alcoholic option of Megan’s favorite drink, the Shirley Temple. The sign for the sangria bar may look professional, but it is another custom-made sign made with love by Amy.

Photo Aug 14, 4 02 02 PMAs friends, we all have different skill sets and interests, which allowed us to collaborate cooperatively to create this awesome soiree. We had such a great time planning, creating, and celebrating and honoring the bride-to-be. We hope to spark an idea and inspire you with these insights and tidbits to Megan’s special day.

See more party ideas HERE!

Photo Aug 14, 4 22 24 PMMessage from the Bride:

I had the best bridesmaids ever who made it such a special day. I loved the homemade, artsy touches that they filled the day with. One of the best parts of the shower was eating all the yummy food and desserts. They also added fun personalized games about myself and my husband-to-be. I absolutely loved all the DIY decorations and was touched how everything was customized just for me. The day was filled with so much love and laughter thanks to my awesome bridesmaids.


Save

GUEST PEACE: Fiber.Spindle.Yarn

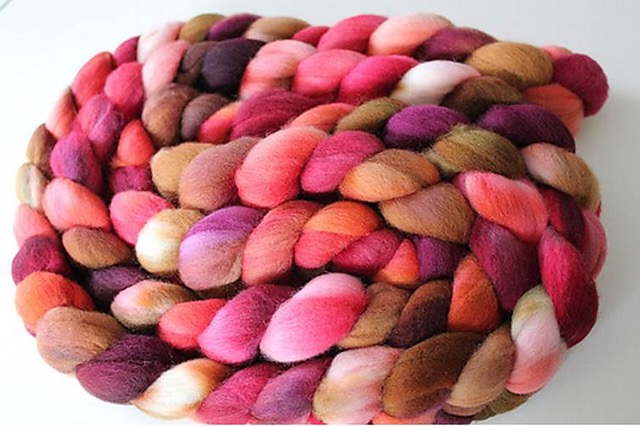
Laura is a 30-something California native who transplanted to the Midwest seven years ago with the love of her life. She isn’t always enamored of the cold weather, but she does love having a great excuse to knit and spin warm woolies. She is a knitter, spinner, podcaster and lover of all things creative.

I’ve been a knitter as long as I can remember. When I was 6 or 7, my grandmother taught me to knit. She patiently cast the stitches onto the needles and talked me through the process, helping me rip things out when I made mistakes and start again.

IMG_5896I knit on and off through my teenage years, but picked it back up again in college.  When I moved home after college, it was the early 2000’s and knitting and the fiber arts were enjoying something of a renaissance. Suddenly I wasn’t shopping at Michael’s any more, but at beautiful stores filled with nothing but yarn and fiber. 

One of the things I had never seen before was people taking fiber, whether straight from the sheep or processed and dyed in beautiful colors, and turning it into yarn. I was fascinated with getting to touch so many parts of the process. I decided to try it – I took a class on spindle spinning and created my first yarn, something that approximated boat rope.  I was fairly discouraged and went back to my knitting.

IMG_5890In 2010 I decided that I wanted to try again. I had made quite a few knitting and spinning friends online through Ravelry, and the spinners were posting gorgeous braids of fiber and even more gorgeous skeins of yarn.
Photo Aug 23, 11 40 08 PMI picked up my spindle again and practiced at it.  I had to learn how to handle the fiber. How to open it up and loosen the fiber (a process called drafting) so that I could then add twist to it and create a single strand.  Then I could wind multiple strands together (a process called plying) to create stronger yarn.
I spun happily on the spindle for about 6 months and then decided that I wanted to try a spinning wheel. I took a class at a local yarn shop and I got to sit at at least a dozen different kinds of wheels, and try my hand at spinning yarn.  I ended up with a petite wheel made by an Australian company, an Ashford Joy.
Photo Aug 23, 11 17 46 PMThese days I continue to spin almost every day.  I love purchasing colorful braids of fiber from dyers and turning them into one of a kind yarns. I sell some of my yarns in an etsy shop and others I use to knit my own sweaters and winter accessories and also to knit toys and gifts for others. I love photographing the entire process from fiber to knitted garment.

Love what you see? You can follow Laura on
her blog, The Corner of Knit and Tea,

Twitter

Instagram

And don’t forget to visit her Etsy shop!

Save

Save

Save

Save

GUEST PEACE: A Pineapple & Flamingo 30th

The last few months have been full of milestones here on A Peace of Creativity with a Kickstarter launch, the arrival of Mel’s niece, and her mom’s 60th birthday. Today I’m sharing another milestone – my little sister’s flamingo-and-pineapple-themed 30th birthday.

The decorations were a mix of DIY projects and curated discount store finds, but the hit of the party was definitely the pineapple made of gerbera daisies from my florist friend at Westwood Flower Garden.

 From the beginning, I knew I wanted to keep the color palette limited to bright pink, green and yellow with touches of gold.

I like hitting a few different discount stores when planning parties, especially if it’s a seasonal event. These awesome flamingo goblets and “sunglasses” were $0.99 and I couldn’t pass them up. Just remember that if you’re really sticking to a theme, don’t try to justify things that only sort of fit your vision just because they’re so inexpensive – in the end you’ll end up with pieces you don’t really love and they’ll detract from what you’re trying to accomplish. I had to remind myself that pineapples and flamingos aren’t the same as luaus quite a few times No matter how cute those coconuts were, they didn’t fit this time around!

My favorite project was making the cupcake toppers – they served the dual purpose of bringing in more pineapple decor and adding a homemade touch.

To make them, I scanned a hand-drawn picture and added a circular border (using PowerPoint, believe it or not!) and then used the same size circular border with letters to spell out a message. I printed it all on glossy photo paper, cut out the circles, and used a circle punch to cut slightly larger circles from sparkly scrapbook paper. A little bit of glue, paired with a toothpick secured with washi tape, and they were done!

The perfect way to relay a birthday wish! As an added sentimental touch, I displayed the cupcakes on a tray that my dad made many years ago.

A party in my family is never complete without fabric bunting. I found pineapple fabric and selected other coordinating prints, folded all the fabric so I could cut out triangles with the flat side on the fold, sewed a seam about ¼” from the fold, and then strung them on string across the patio.

I spent most of the morning setting up the yard, but if you were in the Los Angeles area on July 18, you know what happened – rain! At least my tassel garland stood up to it!

The garland is fairly quick to make and so easy to customize in the colors of your party. I folded each sheet in half and cut strips starting from the bottom edge and stopping about 2-3” from the fold so then when unfolded, there was a solid strip down the center.

Starting on one side, roll or fold the tissue paper into a tube and then twist the center (the way you would wring out a towel).

Fold it in half and then twist the top so it forms a loop. At that point you can string them on rope or twine using knots to keep them in place; I’ve also seen people use glue to keep them evenly spaced.

IMG_4650 My sister’s favorite fruit is watermelon…which just so happens to be the same color as flamingos. A flamingo-shaped cookie cutter was the perfect way to add another personalized touch.

Pineapple extract added an unexpected surprise to my mom’s homemade butter cookies.

We were all a little disappointed that we couldn’t join these guys in the pool (I think one of them took it all a little too seriously!)

But, the most important part was that we all made the best of the situation and my sister had a great 30th birthday!

393197_10100930939217166_496989639_nLauren and I have been best friends for over 20 years and she is my “go to” person for any and all things crafty. Her technical mind mixed with a love of design makes for a beautiful and easy execution of whatever she decides to create.

Save

Save

GUEST PEACE: Boxly

Boxly_TeamKid life doesn’t get much better than playing with an empty cardboard box.  That’s why I am so excited to introduce you to Alicia, Carolyn and Sasha, Product Design Engineers at Stanford University.  Their unique creation, Boxly, touches on all the things a parent could want in a toy: simplistic in form but imaginative and creative in value, environmentally friendly, easy to store, and no batteries required. 

Capture

Our idea for Boxly started with the frustration that so many of the latest toys come with a set of instructions or one “right way to play,” limiting creativity and innovation. As Product Design Engineers, the three of us are always using our hands to build, explore, and problem solve. We believe these are critical skills to develop from an early age. For kids, however, this creative exploration can be scary and unfamiliar — unless it’s in the form of a fort.

LivingRoomFort

But forts take up all the furniture, consume the entire living room, and stay up for weeks.

GlamourShot

We loved the idea of being able to use what kids can find around the house and we began to notice tons of cardboard boxes. So we took this fun and familiar object and created Boxly, a 100% recyclable fort building kit.

Collaboration

It lets kids define their own creative space by giving them the confidence — and the cardboard — necessary to build big. It has the familiarity of a cardboard box without constraining shape or size.

PersonalCardboard

And, the connectors can be used with any standard one-ply cardboard, providing even more opportunities for creativity.

ConnectorWe have intentionally avoided instructions and sample structures because we want kids to take ownership over their play. Kids can use their own cardboard and art supplies to build something they have complete creative control over — and Boxly helps them get started.

With only 16 days left on , they need your help to make Boxly a reality! I can’t wait to see what our daughter can create, and let’s be honest, my husband and I can’t wait to play either.  I hope you will consider supporting Boxly and even better, getting a set of your own!

Find out more about Boxly, and follow their journey on Facebook and Twitter.

Save

Save

Guest Peace: Boxes for Form and Function

393197_10100930939217166_496989639_nLauren and I have been best friends for over 20 years and she is my “go to” person for any and all things crafty. Her technical mind mixed with a love of design makes for a beautiful and easy execution of whatever she decides to create. It only makes sense that she would be my first “Guest Peace”.  I’m sure you will be hearing a lot more from her here!

 About a year ago I finally decided to invest in a few of the brightly colored lacquer boxes and trays that I was seeing on all of the interior design blogs and magazines. But after looking around I realized that I could make them myself — in the colors and shapes I wanted and at a much better price! I had two small unfinished wooden boxes that I had saved from some of those lotion and body wash gift baskets that used to be popular, and I found another larger box at Michael’s. A few coats of spray paint and a couple more of clear coat transformed them into exactly what I was looking for.
LivingRoomThe hardest part was choosing the colors! I decided on a deep blue for my living room where I wanted a pop of color but something that could shift with my mood and the seasons.
Kitchen1 I chose black for the two small boxes. I knew I wanted one in my black and turquoise bathroom, and while I didn’t have an immediate plan for the other one, it’s found the perfect home sitting on my lime green vintage stove.
Bathroom2Even though I wanted the boxes as a decorative touch, they help me stay organized and corral bottles that would otherwise end up all over my kitchen and bathroom counters. They would make great housewarming gifts filled with new dish towels and fancy dish soap to make washing dishes a little more luxurious, or even a bottle of wine and cheese. The possibilities are endless!

Save

Save