Last year was the first time we celebrated the Fourth of July at an Independence Day Parade and I was so impressed by how dressed up and festive everyone was. I made these Star Spangled Shaker Wands and it was so fun for the kids to walk down the parade route waving them around proudly. This year, I decided to make a new version of the shaker wand using cardstock and paper straws!
You and your kids will love how much fun these shaker wands are to make. The little pieces of star confetti float around with every wave. Find out how to make your very own on the Cardstock Warehouse Blog!
I am so excited to be a part of the Cardstock Warehouse 2018 Design Team where I have the opportunity to work with some really beautiful and luxurious paper, alongside some very creative ladies.
My very first post is up! My daughter and I show you how we handmade secret message Valentines and personal paint palettes for her classmates.
One of my favorite Disneyland rides during the holidays is “It’s a Small World.” I love, love, love all of the white sparkly decor and especially the huge white garland that is on almost everything inside the ride! The best part about the garland is the plastic, translucent, iridescent balls on the lights.
I have been wanting to recreate these for years but it was difficult finding iridescent, clear ornament balls that were made of plastic and not glass until I ran into them at Joann’s this season! I think I did a pretty good job…the left is on the actual ride and the right is my version!
To give your garland a little something extra this season, all you need are some white sparkly garland, colorful lights, and plastic, iridescent ornament balls.
To prep the balls, remove the aluminum caps and metal pins.
Slide the pin around the light wires and behind the light you want the ball to go around.
While putting the light in the ball, insert the metal pin as well and push together.
The wire should hold the ball in place, with the light in the center!
Look at how magical they are! I love the way the iridescent ball reflects all of the the different colors of lights. They definitely give me Small World vibes and now I want to make all of our holiday decor in these colors!
***A Peace of Creativity will be moving to a newsletter format sometime in the new year! If you already receive posts in your inbox, your information will transfer over automatically. If not, make sure to sign up here!
It’s a family of SUPERS! Having kids has turned Halloween from one of my least favorite holidays to one of my favorites. Now that my daughter is 4, she is able to tell me exactly who she wants to be and I love the challenge of making the costume. This year she wanted to be a Superhero Princess and it could not be more perfect for her or her brothers as they each have their own sets of superpowers.
Using felt, glitter canvas, gold foil iron-on, metallic duct tape, and sparkly ribbon, I was able to make all of the pieces of their costume. Their arm and leg cuffs and belt are removable using velcro strips. The boys solid onesies are from Primary and I was able to find the capes and masks from Amazon. All of which I embellished using a little hot glue and my Cricut machine.
My husband and I came up with their own logos and symbols to match their superhero names: Super Princess Ellie, Thundercloud Chasey and Lightning Cades!
Thundercloud Chasey
Powers: Strength, Sneakiness Description:Chase the “Thundercloud” sneaks up on bad guys with his stealth moves and surprisingly loud screams. He gets his strength from his “thunder” thighs.
Lightning Cades
Powers: Speed, Throwing Description: Lightning Cades outruns all of his enemies and never stays in one place. He throws everything he can get his hands on and never misses his target.
Super Princess Ellie
Powers: Kindness, Wit, Laughter Description: Ellie isn’t your average superhero or princess. She defeats enemies with her mind and epic dance-offs.
Let me tell you, I had high hopes for a professional photo shoot in front of a green screen and everything and then the flu hit our household and mommy’s superpowers were almost depleted. That’s the thing though about a family of SUPERS, I was able to pull powers from each of these little heroes and my number one hero, my husband, to power through and get these finished just in time for Halloween. Whew!
This post contains affiliate links, which means I receive a small compensation if you make a purchase using the links below.
Part of the problem of being a crafter is that there is always another tool/toy that you want. Have you seen those awesome clear plastic shaker pouches where you can add confetti and sequins inside? Well, I love them. They are made using a fuse tool to melt the plastic together, which I don’t have but want one day. When I saw the Fourth of July Ribbon Wand from Sweet Rose Studio, I knew that there had to be a way that I could make these with the supplies I had. And that’s when I thought, GLUE GUN!
To start with the shaker top of your wand, cut out a shape template. This star was 4 inches across. Insert it into the plastic sleeve.
Heat up the glue gun and run the tip of the glue gun around your shape template slowly to melt the two plastic layers together. Make sure to do this on top of a heat proof surface. I used a silicone mat on top of my cutting mat.
Fuse all the edges together leaving an opening big enough to put in the confetti and glitter stars.
Cut out your star around the fused area leaving extra plastic around the open section.
Cut out some stars, a little larger than the confetti, out of the glitter canvas. I cut enough to glue them back-to-back so that each side was a glitter side!
Remove your paper template from inside the plastic and insert your confetti and glitter stars, the best part! To seal it off, put your paper template on top of your heat mat with your shaker star on top. You can see the template through the plastic and this will allow you to continue to fuse along the remaining edges with your glue gun. The lines were not as straight and thin as they would be with a fuse tool, but they did the job for this project.
Since this was so last minute, I was not able to find any 4th of July themed ribbon. Using the same confetti, I glued red, white and blue stars to the white ribbon. Figure out how full you want your ribbon wands to be and how long to cut them. I used 5 red and 3 white ribbons about 16 inches long. Take your wood dowel and glue gun the ribbons all around the top.Wrap your thin rope to cover the edges of the ribbon around the top of the dowel and secure with hot glue. Add a generous amount of hot glue to the wrapped rope, wait a few seconds for it to cool a bit, and then attach your shaker star.You are ready for your 4th of July parade!
And last but not least…Joy and Disgust! Things have been pretty busy this Halloween weekend, so I will leave you with these shots of our costumes and you can probably tell who I will be and who my hubby will be.
Happy Halloween everyone and thanks for following our Inside Out costume series!
If you missed it, make sure to check out the Fear, Angerand Sadness costumes.
This is Fear! My other twin baby boy will be Fear. He is not really scared all of the time, but he does have a very sweet and sad worried face.
His beanie was a little more complicated as it had the standard rounded top, so I enlisted the help of my BFF and seamstress, Lauren. Fear has one curlycue hair on top of his head. This super fat purple pipe cleaner did the trick. (I have never had to write out “curlycue” before and I am not even sure if that is how you spell it! Someone please enlighten me.)Fear also wears a bow tie and like the tie from Anger, I simply folded, glued and folded until I got the right shape.A hounds tooth patterned vest completed the top, another Lauren addition. Since the fabric was not that stretchy, we overlapped the two sides of the vest and left it to glue shut at the last minute, giving my baby’s cute belly some room to grow and breathe. 🙂Paired with some slacks and Fear is ready to go!As you can probably deduce by now, my husband and I will be Joy and Disgust and I will be sharing those tomorrow!
If you missed it, make sure to check out the Angerand Sadness costumes!
Next up is Anger! One of my twin boys will be Anger and he has the perfect mad face for it. 🙂 Since I didn’t want to use wigs on the babies, I decided to make them beanies instead. I have never made a beanie before but Anger has such a square face that a square beanie did not seem too complicated. I used stretchy red fleece and also picked up some stiff felt for the flames that would be on top of his head.The hardest part was sewing the finished flames into the top of the beanie. The material was very thick especially layered on top of each other.
In the movie, Anger’s outfit is pretty simple. White top, slacks and a red tie, he is all business. I found the perfect red pattern for an almost vintage feel for the tie. I’d like to say I had a method for constructing it, but I basically started with a piece of fabric and just glued, folded, glued, folded, glued, until I got the shape that I wanted.
To make it comfy, the tie was fabric glued onto a long sleeved white onesie.Baby khaki trousers completes the look.
Three more costumes to go. If you missed it, see the Sadness costume here!
This post contains affiliate links, which means I receive a small compensation if you make a purchase using the links below.
If you haven’t guessed, our family costume this year is Inside Out. My daughter chose to be Sadness and the whole family jumped on board. Leave it to my daughter to pick the emotionally complex one and I was actually quite proud that she did!
Thankfully these costumes turned out to be quite simple. I found both the wig and the glasses from Amazon.
I knew that living in Southern California there was a good chance that it might be hot in Halloween. I asked my mom if she could crochet some wrist cuffs and just the neck part to give the allusion of a turtleneck sweater.
I also found her blue top and pants from Amazon which is super helpful when I can’t always get out of the house.
My daughter and I worked on putting together treat bags for the trick-or-treaters. If you know me, then you know I love giving out goodie bags. Here’s what’s inside this year.
I absolutely adore these drawstring bags from Oriental Trading. Halloween for me is more cute than scary. That probably says more about my life than I would care to admit. 🙂
Also from Oriental Trading, I found Peanuts paper airplanes that come in a compact little package and are super easy to put together. Even the big kids like paper airplanes, and by big I mean my adult male friends. (These were so popular, I think they sold out. I couldn’t find the link for this one but there are a lot more Halloween Peanuts items for sale!)
Instead of glow in the dark light sticks, I chose glow in the dark Halloween stickers.
And we didn’t forget the chocolate! I know some people choose to do the opposite but we always pick the candy we like to eat since we know there will be leftovers.
If you love to hand out candy to the trick-or-treaters, you should try putting bags together. The kids go bonkers over them and all it takes is a trip to the dollar store or even just putting your handful of candy in a goodie bag!


 One of my favorite Disneyland rides during the holidays is “It’s a Small World.” I love, love, love all of the white sparkly decor and especially the huge white garland that is on almost everything inside the ride! The best part about the garland is the plastic, translucent, iridescent balls on the lights.

 To prep the balls, remove the aluminum caps and metal pins.


 This post contains affiliate links, which means I receive a small compensation if you make a purchase using the links below.
 Cut out some stars, a little larger than the confetti, out of the glitter canvas. I cut enough to glue them back-to-back so that each side was a glitter side!

 Wrap your thin rope to cover the edges of the ribbon around the top of the dowel and secure with hot glue. Add a generous amount of hot glue to the wrapped rope, wait a few seconds for it to cool a bit, and then attach your shaker star.
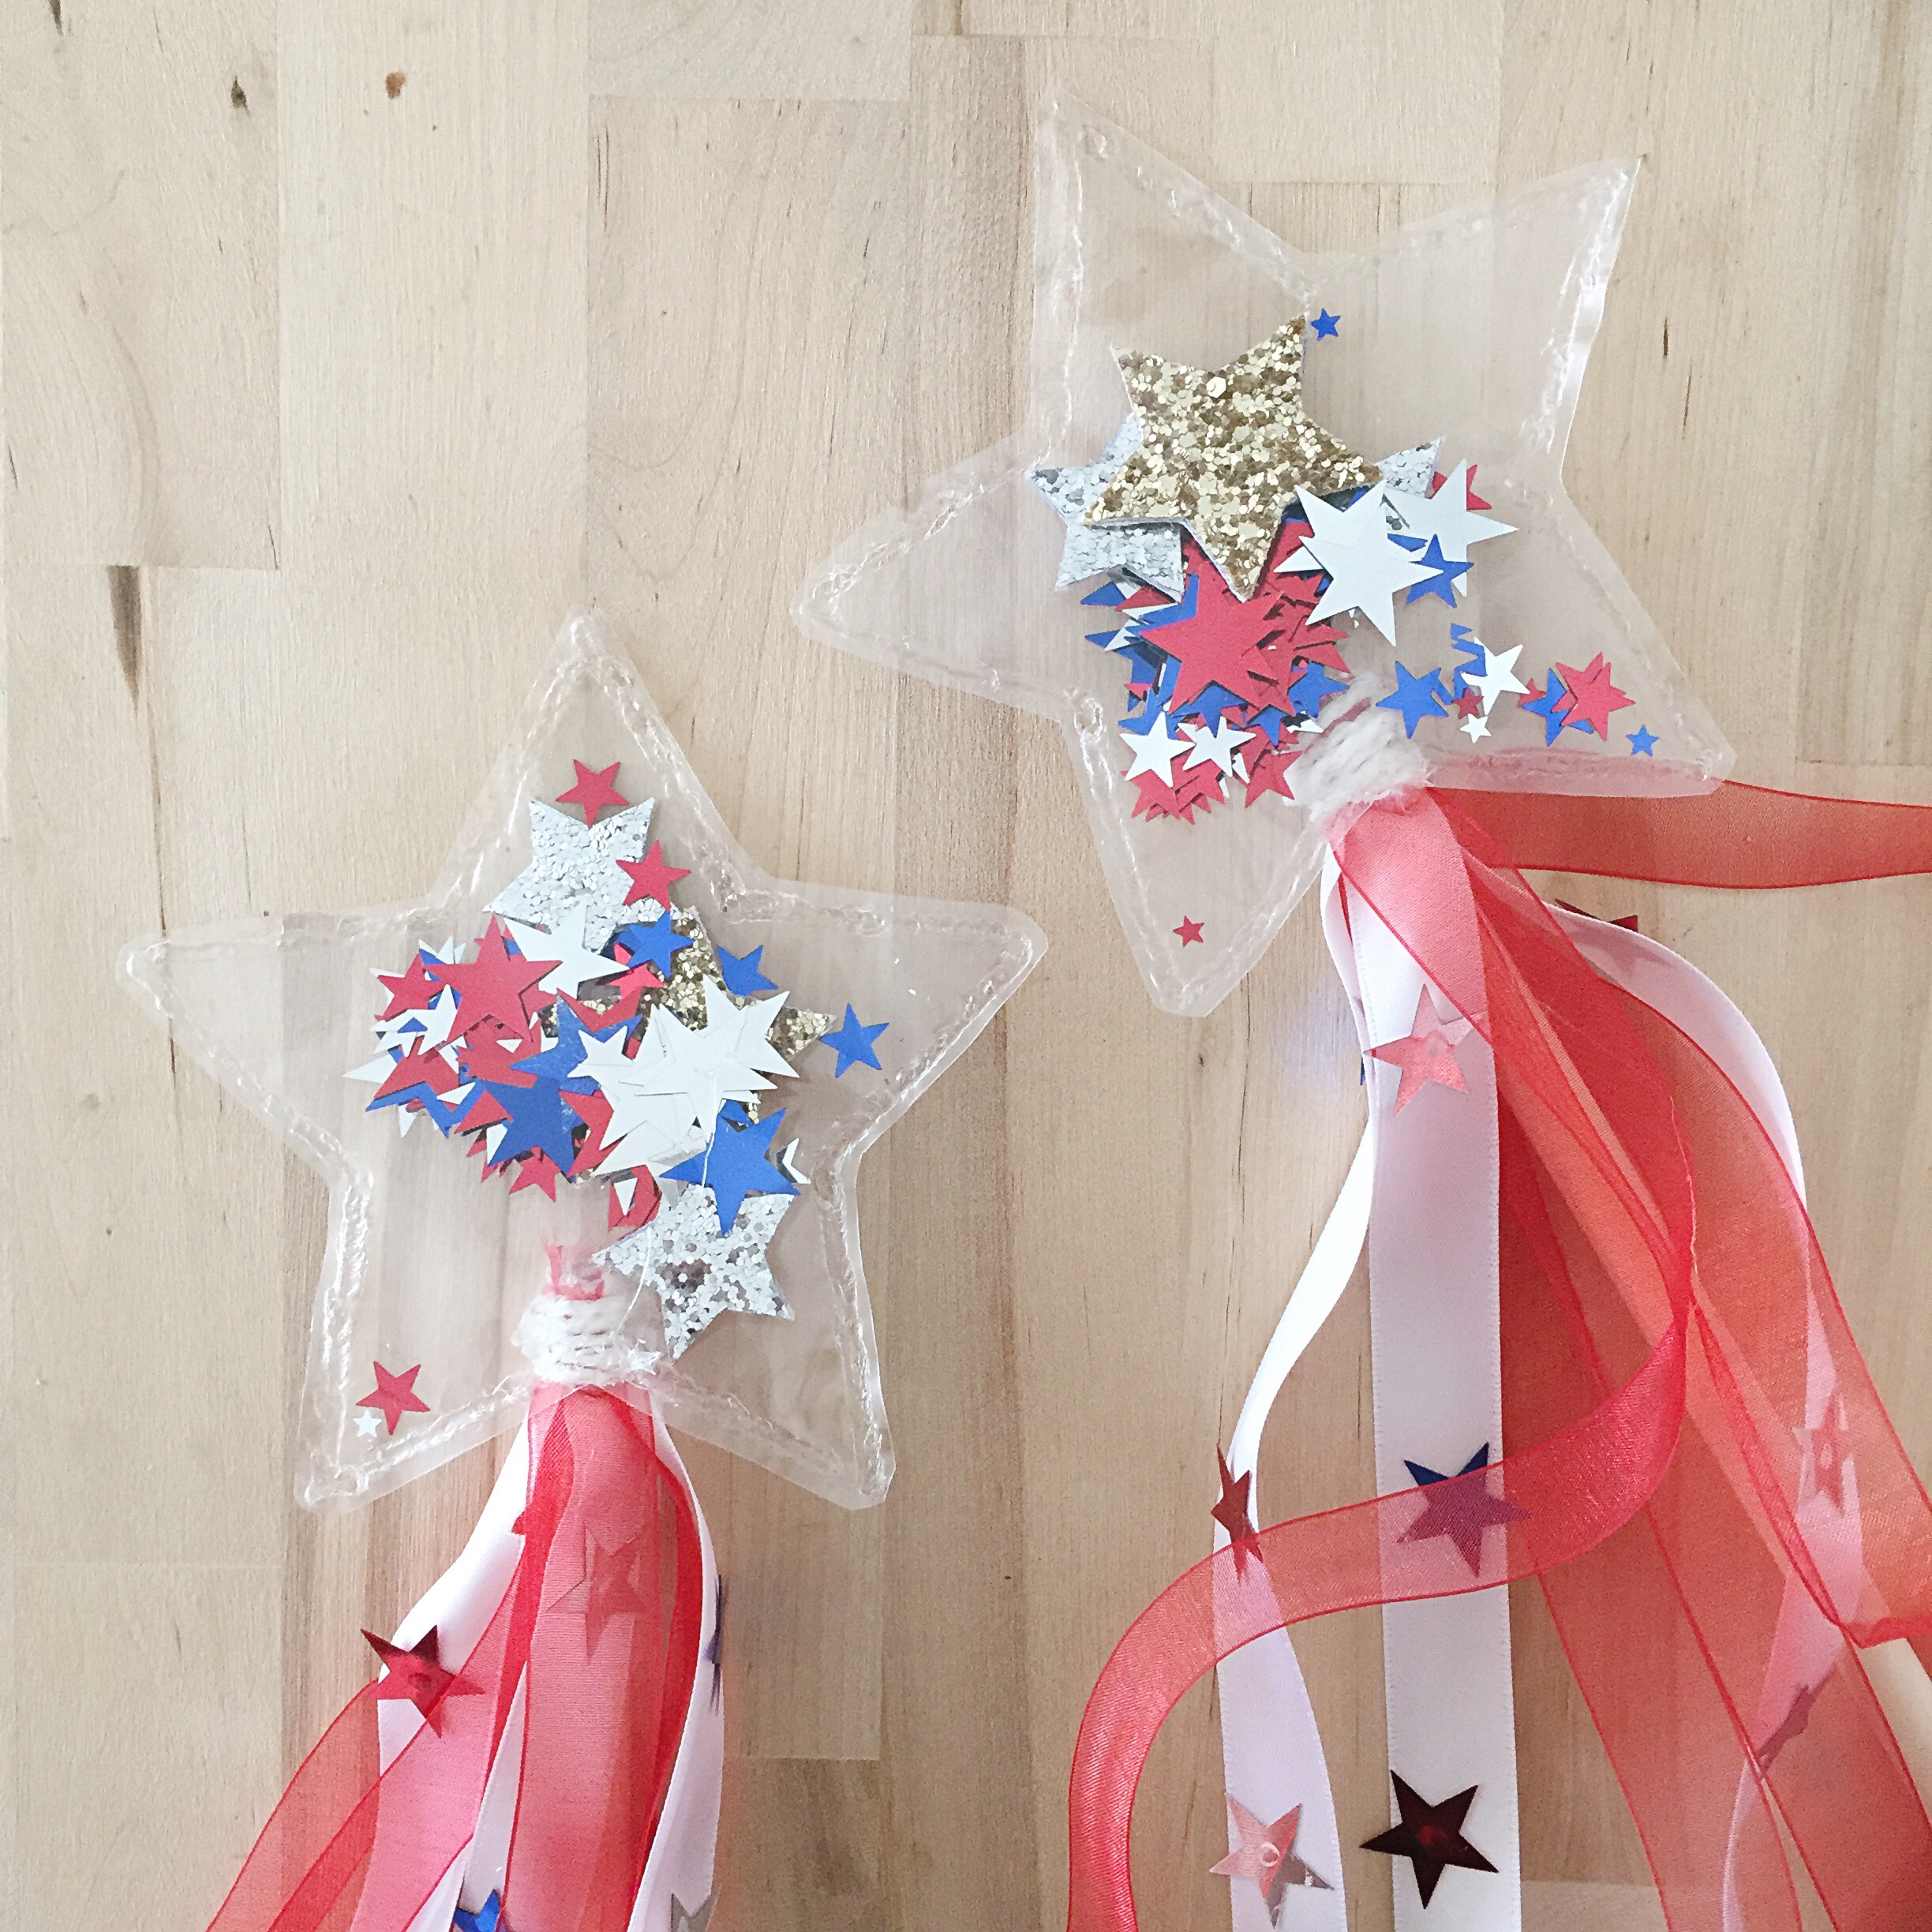


 The hardest part was sewing the finished flames into the top of the beanie. The material was very thick especially layered on top of each other.
 In the movie, Anger’s outfit is pretty simple. White top, slacks and a red tie, he is all business. I found the perfect red pattern for an almost vintage feel for the tie. I’d like to say I had a method for constructing it, but I basically started with a piece of fabric and just glued, folded, glued, folded, glued, until I got the shape that I wanted.


